I hope every one has had a wonderful holiday season this year, I know I have. The last three months have absolutely flown by, partly because we quite literally had one get together after the other. It all started with Thanksgiving and ended the day after Christmas, but it's a short break before the festivities of ringing in the New Year. We are having some family over to play some Wii and maybe watch a movie this year. I am planning on some finger foods, not sure what yet, but I will be sure to get the posted next week. I also received some new kitchen and gadgets that I can't wait to get to use and show them off to every body.
Now what post a couple of days before New Year's would be complete with out at least talking about one's New Years resolutions? Yes, I have made New Year's resolutions for my time in the kitchen as well as for the blog.
1. Be more adventurous in recipe selection!
2. Look for healthy comfort food alternatives.
3. Try new recipes on the grill.
4. Shake it up with mixed drinks and cocktails.
5. Do more recipes that my little girl can help with.
So there it is, my short list of goals for 2011! It's simple enough so I should be able to actually accomplish most if not all of them. Well I hope every one has had a Happy Holidays and I wish you all a Happy New Year!

Thursday, December 30, 2010
Tuesday, December 28, 2010
My Ugly Drum Smoker Build!
I have spent the last year researching how to build a smoker that would give me steady temperatures and be capable of doing an eight to ten hour cook with out being forced to add more fuel. Now I could spend some serious money on a Weber Smokey Mountain or a Traeger, but I really wanted something that I built. The plans I found were to build a smoker that has affectionately been named the Ugly Drum Smoker or UDS for short. I visited such sites as The Pickled Pig, the BBQ-Brethren, and recently the BBQ Central; all these sites are loaded with information on building this smoker. I must have spent months crawling through all the posts with ideas that have succeeded and ideas that have failed in the attempt of building one of these smokers. In the end I decided to try and keep my build as cheap and simple as possible. So I stuck to the basics and even borrowed from a commercially built unit known as the Big Drum Smoker.
The toughest part of this whole project was tracking down a food quality 55 gallon drum and it took a better part of a year to get one, so be prepared for a long hunt. I finally landed a barrel that had contained honey at one point in it's life and at the time I found it, it was being used as a trash can with barrel liners. In fact when I got it home, you could still see some of the honey residue inside of it. The barrel was lined with a tan epoxy and there is two ways to go about removing it. The easiest would be to take it to a body shop and pay to have it sand blasted inside and out, a few have even then had the body shop powder coat the outside for them. The cheapest way is to load it up with wood and burn it out, which is the technique I chose. Before I lit my fire I drilled four 3/4" hole around the bottom for intakes. It's important to do this before the burn as it will guarantee plenty of airflow for a good hot fire. I used this as an opportunity to burn up all the limbs I had collected from my yard over the last year as well as an oak log that was had been a yard ornament with the families last name carved into it. I did two burns that totaled 6 hours and this was enough to burn off all the paint from the outside of the drum, but I still had a fair amount of the liner left inside. I used a 3M Rust and Paint Remover drill attachment wheel that I found in the paint removal aisle at Lowe's. It took me about an hour to remove what was left of the liner as well as some rust that had formed from it's previous life.

When it came time to drill the holes for the cooking grate I had to do a little math to find out how far down to put the cooking grate. What you want is to have the cooking grate 24 inches from the bottom of the charcoal basket, with 2 inches below the charcoal basket for ash buildup. My barrel was 34 inches tall, so I did some simple math and came up with having a cooking grate 7 inches from the top of the drum.
 For my charcoal basket I took the lid from an old Brinkmann bullet that I had now sitting around. I drilled out the bottom and the sides with a 1/2 inch drill bit, this should allow the ash to fall away and good air flow to feed the fire. The sides I drilled with the same size drill bit as the bottom, it may need more holes for better ventilation but I will see how this works out. I also used the legs from the body of the old smoker to hold the now basket up off the bottom giving it a clearance of 2 inches. I plan on adding an 18 inch pie pan underneath the basket and attach it to the basket to aide in ash removal after the cook.
 In effort to keep the cost down I used stainless steel caps as a means to control the intakes. As you can see I put a 1-1/2 inch machine screw with two nuts to act as a grab handle to remove the cap if more air is needed. This may be revised with using some black pipe nipple's, nipple cap's, and a ball valve for better air control.
 When it came time to drill the holes for the cooking grate I had to do a little math to find out how far down to put the cooking grate. What you want is to have the cooking grate 24 inches from the bottom of the charcoal basket, with 2 inches below the charcoal basket for ash buildup. My barrel was 34 inches tall, so I did some simple math and came up with having a cooking grate 7 inches from the top of the drum. I used 1 1/2 inch x 1/4 inch stainless steel bolts with lock washer and nut to rest my cooking grate on. I scavenged a cooking grate from an old 22 1/2 inch Weber kettle that I had lying around. As you can see it was a bit rusty, so to fix that I heated it up in the gas grill and hit with my BBQ steel bristle brush. After it was free of rust and as much gunk as I could scrape off I sprayed it with Pam in preparation for seasoning it.
Seasoning is an important step, the better seasoned a smoker is the more flavor you food will have. Now I'm not talking about having a pit or a grate that is so disgusting your spouse or kids would not eat out of it, but you do want the pit to be good a greasy. The seasoning process is as easy as spraying down the inside of the cooking chamber with Pam or covering with any cooking oil, then start a basket of charcoal as if you were going to be actually cooking. Then let the pit come up to cooking temperature 225º-275º F. Be sure to throw quite a few chunks of wood on there, like hickory, to help the seasoning process.
My extra's to this grill include a 6 inch piece of 2 inch conduit for a stack as well as a coat hook to the under side of the lid, which gives me a place to hang the lid while tending to the pit. I have plans to put a handle on the lid as well as two handles on the side of the body to make it easier to move around. I also have plans for adding a table to the side so I have a place to set things while I'm cooking. The paint is flat red Rust-Oleum 2000º High Heat Paint, that I picked up from Autozone. It took me two cans to paint the drum, but I also was forced to paint outside which is always makes painting with a rattle can difficult.

The thermometer required a 7/8 inch hole drilled just below the cooking grate, and is held in place with a nut and washer that attach to the back of the thermometer. This was the last hole I drilled because I wasn't quite sure where I wanted it. There are some who like the thermometer on the lid as appose to the side, which I found out from later cooks was because there is some big temperature differences when cooking in cold and windy weather. I have not had the opportunity yet to cook on a day where the temperatures got above 50º and the wind was not blowing. I will be sure to update you when some warmer weather comes along and I can get a better idea on how even the temperatures will be.
The toughest part of this whole project was tracking down a food quality 55 gallon drum and it took a better part of a year to get one, so be prepared for a long hunt. I finally landed a barrel that had contained honey at one point in it's life and at the time I found it, it was being used as a trash can with barrel liners. In fact when I got it home, you could still see some of the honey residue inside of it. The barrel was lined with a tan epoxy and there is two ways to go about removing it. The easiest would be to take it to a body shop and pay to have it sand blasted inside and out, a few have even then had the body shop powder coat the outside for them. The cheapest way is to load it up with wood and burn it out, which is the technique I chose. Before I lit my fire I drilled four 3/4" hole around the bottom for intakes. It's important to do this before the burn as it will guarantee plenty of airflow for a good hot fire. I used this as an opportunity to burn up all the limbs I had collected from my yard over the last year as well as an oak log that was had been a yard ornament with the families last name carved into it. I did two burns that totaled 6 hours and this was enough to burn off all the paint from the outside of the drum, but I still had a fair amount of the liner left inside. I used a 3M Rust and Paint Remover drill attachment wheel that I found in the paint removal aisle at Lowe's. It took me about an hour to remove what was left of the liner as well as some rust that had formed from it's previous life.

When it came time to drill the holes for the cooking grate I had to do a little math to find out how far down to put the cooking grate. What you want is to have the cooking grate 24 inches from the bottom of the charcoal basket, with 2 inches below the charcoal basket for ash buildup. My barrel was 34 inches tall, so I did some simple math and came up with having a cooking grate 7 inches from the top of the drum.


Seasoning is an important step, the better seasoned a smoker is the more flavor you food will have. Now I'm not talking about having a pit or a grate that is so disgusting your spouse or kids would not eat out of it, but you do want the pit to be good a greasy. The seasoning process is as easy as spraying down the inside of the cooking chamber with Pam or covering with any cooking oil, then start a basket of charcoal as if you were going to be actually cooking. Then let the pit come up to cooking temperature 225º-275º F. Be sure to throw quite a few chunks of wood on there, like hickory, to help the seasoning process.
My extra's to this grill include a 6 inch piece of 2 inch conduit for a stack as well as a coat hook to the under side of the lid, which gives me a place to hang the lid while tending to the pit. I have plans to put a handle on the lid as well as two handles on the side of the body to make it easier to move around. I also have plans for adding a table to the side so I have a place to set things while I'm cooking. The paint is flat red Rust-Oleum 2000º High Heat Paint, that I picked up from Autozone. It took me two cans to paint the drum, but I also was forced to paint outside which is always makes painting with a rattle can difficult.

Thursday, December 23, 2010
Minestrone Stew
I've decided to try and make an effort to use my slow cookers more this winter, so I pulled out the one slow cooker cook book I have and dusted it off. The cook book is titled Best of Country Slow Cooker Recipes and looks like it was put together by the Crock Pot brand. But it's full of all kinds of different recipes and a few have you cooking things I wouldn't have thought of trying in a slow cooker. Here in Missouri we had a decent cold spell a couple of weeks ago and I was in the mood for something to really warm us up. I found the a recipe for minestrone stew, which made me laugh because of a Mickey Mouse Club House episode where Minnie fixers her Minniestronie Stew; and all those with toddlers that watch it probably know the exact episode I'm talking about. My little girl liked it, so I would call it kid approved.
 1 pound ground beef
1 small onion, chopped
1 can (19 ounces) ready-to-serve minestrone soup
1 can (15 ounces) pinto beans, rinsed and drained
1 can (14-1/2 ounces) stewed tomatoes
1 can (11 ounces) whole kernel corn, drained
1 can (4 ounces) copped green chilies
1 teaspoon salt
1/2 teaspoon garlic powder
1/2 teaspoon onion powder
In a skillet, cook beef and onion until meat is no longer pink; drain. Transfer to slow cooker. Add the remaining ingredients; mix well. Cover and cook on low for 4-6 hours or until heated through. Yield: 8 servings.
Tuesday, December 21, 2010
Peanut Butter Fudge
This was my first attempt at peanut butter fudge and it came out perfect. It was soft, creamy, and absolutely delicious. I have prepared chocolate fudge before and I have learned a couple of lessons from past failures. The first lesson is to use a timer to keep track of the seven minutes, or you can use a candy thermometer if you have one. The next lesson is to use either a wooden spoon or a metal spoon to stir the sugar, evaporated milk, and butter mixture; a plastic spoon will melt and become part of the fudge. Go ahead, ask me how I know!
 Ingredients:
4 cups white sugar
1 cup ligh brown sugar
1/2 cup butter
1 (12 fluid ounce) can evaporated milk
1 (7 ounce) jar marshmallow creme
1 (16 ounce) jar peanut butter
1 teaspoon vanilla extract
Directions:
1. Grease a 9x13 inch baking dish.
2. Ina medium saucepan over medium heat, combine sugar, brown sugar, butter and evaporated milk. Bring to a boil, stirring constantly, and boil for 7 minutes. Remove from heat; stir in marshmallow creme until well incorporated and melted. Stir in peanut butter and vanilla until smooth; spread in prepared pan. let cool before cutting into squares.
Friday, December 17, 2010
Christmas Sugar Cookies
I always have fond memories of my Mom making sugar cookies for Christmas and how much fun they were to decorate, so I just had to be sure and continue this with my family. While my little one is still to young to do to much, she did help dump the ingredients in the mixer and cut out the cookies with the cookie cutter. She is destined to be my little helper in the kitchen for sure. I also got a little creative with the decorating and let my often under used art abilities loose.
 Ingredients:
1 1/2 cups butter, softened
2 cups whit sugar
4 eggs
1 teaspoon vanilla extract
5 cups all-purpose flour
2 teaspoons baking powder
1 teaspoon salt
Directions:
1. In a large bowl, cream together butter and sugar until smooth. Beat in eggs adn vanilla. Stir in the flour, baking powder, and salt. Cover, and chill dough for at least one hour or overnight.
2. Preheat oven to 400º F. Roll out dough on floured surface 1/4 to 1/2 inch thick. Cut into shapes with any cookie cutter. Place cookies 1 inch apart on undgreased cookie sheets.
3. Bake 6 to 8 minutes in preheated oven. Cool completely. (I actually had to cook mine for ten minutes to be able to scoop them off the cookie sheet.)
Monday, December 13, 2010
Layered Mexican Chicken
This past year I have been pretty focused on losing weight and getting in shape. To do so I tortured my self with eating a lot of grilled chicken breast and I have found my self no longer able to eat plain grilled chicken. So the hunt was on to find a possible replacement and I happened across this Weight Watchers recipe for Layered Mexican Chicken. I knew once I read the ingredients and the amount this recipe makes it would be perfect for cooking, cutting into proper portions, and freezing up for meals on the go.
 Ingredients
1 spray olive oil cooking spray
2 pound uncooked boneless, skinless chicken breast
30 oz canned black beans, rinsed and drained
3 cups fat-free sour cream
2 cups shredded reduced-fat Mexican-style cheese, divided
8 oz chopped green chilies, two 4-oz cans
2 tsp ground cumin
1/2 tsp black pepper
12 medium corn tortillas, cut into 2 inch strips
1 cups slasa, mild, medium, or hot
Directions
Preheat oven to 350º F. Coat lasagna pan with cooking spray
Place chicken in medium saucepan and fill with enough cold water just to cover chicken. Set pan over high heat and bring to a boil. Reduce heat o medium and simmer until chicken is cooked through, about 10 to 15 minutes; drain. When chicken is cool enough to handle, cunt into 1-inch pieces.
Transfer chicken to a large bowl and add beans, sour cream, 1 cup of shredded cheese, chilies, cumin, and pepper; mix well and set aside.
Arrange half of tortillas in bottom of prepared lasagna pan, overlapping pieces to cover surface. Top tortillas with half of chicken mixture, layer with remaining tortillas and then top with remaining chicken mixture. Sprinkle with remaining cup of cheese.
Bake until filling is bubbly and cheese is melted, about 30 minutes. Let stand 5 minutes before slicing into 12 pieces. Serve with salsa on the side.
POINTS Value: 6
Servings :12
Thursday, December 9, 2010
BBQ Mesquite Pork Tenderloin
I was at the grocery store looking over the small selection of whole pork tenderloins and was left with a choice between purchasing a seasoned prepackaged tenderloin or a plain one to do with as I please. I decided to give the seasoned tenderloin a shot as I have never just picked one of these up before, mainly because it's always fun to try a new recipe or rub every time I grill. This particular tenderloin was labeled as BBQ Mesquite which complimented the pork very well, and the meat was very tender and juicy. Now I know this isn't a new recipe, but I just had to share my experience trying a piece of meat packaged in seasoning. I'm afraid that I do not recall the name on the package, but I found this one at Target so it is very possible it was done on site. Now one thing to keep in mind when purchasing meat that has been seasoned by the store is when was it seasoned. Because if there is a high salt content in the rub it could dry out the meat, so be sure to check expiration dates closely and keep your eyes open for a date of preparation.

I cooked this tenderloin on my gas grill indirect at 400 degrees F for approximately 45 minutes, flipping after 20 minutes.

I cooked this tenderloin on my gas grill indirect at 400 degrees F for approximately 45 minutes, flipping after 20 minutes.
Wednesday, December 8, 2010
Creamy Cheesecake
For Thanksgiving I was put in charge of making a dessert and as our family loves cheese cake it was a perfect time to try this recipe from Carries Sweet Life. It's a no bake cheese cake that is so smooth and light it will be sure to please. My whole family loved it and I will definitely be preparing this recipe again in the future.

Ingredients
1 graham cracker curst
1 pkg. cream cheese
1/3 cup sugar
8 oz. sour cream
2 tsp. vanilla
8 oz. Cool Whip
Directions
Whip all ingredients until smooth.
Spoon into crust
Chill at least 4 hours before serving.
Graham Cracker Crust
Ingredients
1-1/2 cups crushed graham crackers
1/4 cup sugar
1/3 cup butter, melted
Directions
In a small bowl, combine the crums and sugar; add butter and blen well. Press onto the bottom and up the sides of an ungreased 9-in. pie plate.
Refrigerate for 30 minutes before filling, or bake at 375 degrees F for 8-10 minutes or until curst is lightly browned. Cool on a wire rack before filling.

Ingredients
1 graham cracker curst
1 pkg. cream cheese
1/3 cup sugar
8 oz. sour cream
2 tsp. vanilla
8 oz. Cool Whip
Directions
Whip all ingredients until smooth.
Spoon into crust
Chill at least 4 hours before serving.
Graham Cracker Crust
Ingredients
1-1/2 cups crushed graham crackers
1/4 cup sugar
1/3 cup butter, melted
Directions
In a small bowl, combine the crums and sugar; add butter and blen well. Press onto the bottom and up the sides of an ungreased 9-in. pie plate.
Refrigerate for 30 minutes before filling, or bake at 375 degrees F for 8-10 minutes or until curst is lightly browned. Cool on a wire rack before filling.
Thursday, December 2, 2010
Citurs & Salsa Roast Pork
It's starting to get pretty cold around here and with the sun setting so early I want recipes that have me indoors cooking instead of running in and out tending the food on the grill. I found this recipe from Cambell's that is loaded with flavor. I used some one inch thick pork chops as I was only cooking for two, which still leaves plenty of left overs. I served with with mashed potato's and whole kernel corn.

Ingredients
1 jar (11 ounces) Pace Chunky Salsa
1 cans (11 ounces) Mandarin orange segments, drained
2 (1 pound each) pork tenderloins
1 teaspoon olive oil
2 tablespoons chopped fresh cilantro leaves
1 lime, cut into wedges
Directions
Heat the oven to 425º F. Stir the salsa and oranges in a small bowl
Place the pork into a 3-quart shallow baking pan. Rub the pork with the oil. Pour the salsa mixture over the pork.
Bake for 35 minutes or until the pork is cooked through. Remove the pork from the pan and let stand for 10 minutes. Sprinkle with the cilantro and serve with the lime.
Tuesday, November 30, 2010
Turkey Fajitas
I hope every on had a Happy Thanksgiving! I know at our house we had a great day filled with family and good food, and for that I am thankful. Now I love just about every dish at Thanksgiving and many of them I enjoy them for days after-wards. My favorite leftover meal has always been a cold turkey sandwich, to the point that I often think I would ask for it as part of my last meal. But if you want something other then cold turkey sandwich and reheated mashed potato's, Campbells has a great recipe for Turkey Fajitas and even puts that left over gravy to use.

I was skeptical of a fajita recipe that askes you to mix salsa and gravy together. It just doesn't sound that appetizing to me, but I'm glad I tried this recipe because it was delicious! It's full of flavor and keeps you coming back for more.
Ingredients
2 jars (12oz each) Campbell's Slow Roast Turkey Gravy
1 cup Pace Picante Sauce
2 tbsp vegetable oil
2 small green or red peppers, cut into 2 inch long strips (about 2 cups)
2 medium onions, sliced, (about 2 cups)
3 cups cooked turkey or chicken strips ( I used chicken strips, as I fixed this before Thanksgiving, and was very pleased with how it tasted)
12 flour tortillas (6 inch), warmed
Sliced pitted ripe olives
Directions
Stir the gravy and Picante sauce in a 2-quart saucepan.
Heat the oil in a 10-inch skillet over medium heat. Add the peppers and onions and cook until they're tender-crisp, stirring occasionally. Stir in 2 cups gravy mixture and the turkey. Reduce the heat to low. Cook until the mixture is hot and bubbling.
Spoon 1/3 cup turkey mixture down the center of each tortilla. Fold the tortillas around the filling. Heat the remaining gravy mixture over medium heat until the mixture is hot and bubbling. Serve with the filled tortillas. Garnish with olives.
Tuesday, November 23, 2010
Cheesy Beef-Corn Chip Skillet
I first started cooking when I got married and I only had so many things I knew how to cook. The one recipe that was quick and was always easy were tacos, and my wife loved them so much she requested them every week. Well needless to say doing this blog has really pulled us out our newly wed recipe rut. But when I saw this recipe that offered something new by adding Velveeta, I had to at least try it. This recipe did not disappoint and is a great alternative to regular old tacos.
 Ingredients:
1 lb. ground beef (I this recipe twice, once with beef and once with ground turkey. I liked them both.)
1 small onion, chopped
3/4 cup water
1 pkg. Taco Bell Home Originals Taco seasoning
2 cups corn chips
1/4 lb. Velveeta (4 oz.) cut into 1/2 inch cubes
2 cups shredded lettuce
2 tomatoes, chopped
Directions:
Brown meat with onions in large skillet; drain. Add water and seasoning mix; cook as directed on package.
Cover meat mixture with chips and Velveeta; cover. Cook on low heat 5 min. or until Velveeta is melted.
Top with lettuce and tomatoes.
Friday, November 19, 2010
Harry Potter and the Deathly Hallows
Today marks the beginning of the end in the Harry Potter movie series, something I've both looked forward to and dreaded at the same time. I have enjoyed every movie just as much as I enjoyed reading the entire series. So for those who have not read the book, and will be going into these final two movies in the dark, I will not give away any details accept for one. That one thing simply revolves around their wands. As you remember Harry Potters and Voldemort's wands are brothers, which makes their battles special. In the final movie you will see Voldemort going to great lengths to defeat Harry Potter, sadly we will have to wait another year to see if he does so or if Harry Potter will triumph over evil. So for the final movie I give you Chocolate Covered Pretzel Wands!

I had intended on doing all 6 movies leading up today, but due to time and the splitting of the final movie. I have chosen instead to do the first three and reserve the final three for the final movie.
 Ingredients
10 ounces pretzel sticks (Pretzel RODS)
12 ounces milk chocolate chips (or melting discs)
1/2 cup wihite chocolate chips (optional)
candy sprinkles (optional)
miniature M&M's chocolate candies (optional)
mini Reese's pieces (optional)
chopped peanuts (optional)
Directions
1.Melt milk chocolate chip in double boiler or in microwave (be careful not to burn in the micro).
2. If you are using the white chocolate, wait until later before melting unless you can keep it over warm water.
3. Dip each pretzel rode about 2/3 of the way up in chocolate.
4. Lay on wax paper lined baking sheets, lining up the rods but leave a bit of space between them.
5. Allow to set a little, but not completely dry (while waiting, make sure your white chocolate is ready).
6. Dip a fork into the white chocolate and drizzle over the milk chocolate by gently swishing the fork back and forth over the rods but not touching them.
7. Place your sprinkles or candies on a paper plate and roll each pretzel rod in desired topping (or jus sprinkle on).
8. Lay back on wax paper to set completely.
9. These look great displayed in, or given in, a unique glass or mug.
I ran into one little problem, and that was picking the chocolate covered rods up off of the wax paper. My loving wife suggested placing them in fridge, she said she read that should help to let the chocolate release the paper and it worked. It was this sticking problem that I just sprinkled on my topping and did not try the roll method.

I had intended on doing all 6 movies leading up today, but due to time and the splitting of the final movie. I have chosen instead to do the first three and reserve the final three for the final movie.

10 ounces pretzel sticks (Pretzel RODS)
12 ounces milk chocolate chips (or melting discs)
1/2 cup wihite chocolate chips (optional)
candy sprinkles (optional)
miniature M&M's chocolate candies (optional)
mini Reese's pieces (optional)
chopped peanuts (optional)
Directions
1.Melt milk chocolate chip in double boiler or in microwave (be careful not to burn in the micro).
2. If you are using the white chocolate, wait until later before melting unless you can keep it over warm water.
3. Dip each pretzel rode about 2/3 of the way up in chocolate.
4. Lay on wax paper lined baking sheets, lining up the rods but leave a bit of space between them.
5. Allow to set a little, but not completely dry (while waiting, make sure your white chocolate is ready).
6. Dip a fork into the white chocolate and drizzle over the milk chocolate by gently swishing the fork back and forth over the rods but not touching them.
7. Place your sprinkles or candies on a paper plate and roll each pretzel rod in desired topping (or jus sprinkle on).
8. Lay back on wax paper to set completely.
9. These look great displayed in, or given in, a unique glass or mug.
I ran into one little problem, and that was picking the chocolate covered rods up off of the wax paper. My loving wife suggested placing them in fridge, she said she read that should help to let the chocolate release the paper and it worked. It was this sticking problem that I just sprinkled on my topping and did not try the roll method.
Thursday, November 18, 2010
Harry Potter and the Prisoner of Azkaban
In the third installment of the Harry Potter Series Harry and Hermione find themselves forced to travel back in time to save their good friend Buckbeak. Little did they know that they had all ready saved him and were now getting to witness that the executioner had only sliced a huge pumpkin from Hagrid's garden. So in honor of the life saved by the heroics of Harry and Hermione as well as the pumpkin so graciously sliced open by the executioner, I give you a Spiced Pumpkin Cheesecake!

Now I always love it when a new recipe is a hit, but this one hasn't been well received. It has to do with the simple fact that it tastes and looks some what close to pumpkin pie, but then it also has the texture and taste of a cheesecake. This has led to the reoccurring statement that one would rather have pumpkin pie or a cheesecake, not both. I have to say I'm in agreement with said statement. However, it was still enjoyable to try a new recipe for the experience, no matter what the outcome is.
Ingredients
28 Nabisco ginger snaps, finely crushed
1/4 cup finely chopped Planters Pecans
1/4 cup butter, melted
4 pkg. (8 oz. each) Philadelphia Cream Cheese, softened
1 cup sugar
1 can (15 oz) pumpkin
1 tbsp pumpkin pie spice
1 tsp. vanilla
4 eggs
1 cup thawed Cool Whip Whipped Topping
1/2 tsp ground nutmeg
Directions
Heat oven to 325ºF. Mix crumbs, nuts and butter; press onto bottom and 1 inch up side of 9 inch spring form pan. Beat cream cheese and sugar with mixer until blended. Add pumpkin, spice and vanilla; mix well. add eggs, 1 at a time, mixing after each just until blended. Pour into crust. Bake 1 hour 20 min. to 1 hour 30 min. or until center is almost set. Loosen cake from rim of pan; cool before removing rim. refrigerate 4 hours. Serve with a dollop of Cool Whip and a dusting of nutmeg.
(Recipe was found as an advertisement in Kraft magazine)
Wednesday, November 17, 2010
Harry Potter And The Chamber of Secret's!


Ingredients
1 (12-ounce) package semesweet morels
1/2 cup creamy peanut butter
2 cups pretzel sticks
Directions
Place parchment paper on baking sheet; set aside
In a large glass microwave-safe bowl combine chocolate chips and peanut butter. Melt on high for 2 to 3 minutes. Remove and stir until smooth. (I made two separate batches of the chocolate mixture and set one aside to use as a glue to hold the legs in place.)
Stir in pretzel sticks. With clean hands grab pretzel stick and drop on prepared baking sheet in clusters to look like spiders. (Be sure to crumble the pretzels in the chocolate mixture so their easier to eat.)
Place in freezer for 5 minutes or until chocolate is hardened. Remove and serve. (Be sure to serve them quickly as the chocolate will not set up like no bake cookies)
Tuesday, November 16, 2010
Harry Potter The Sorcerer's Stone
November 19th is the release date of the first half of the final Harry Potter movie, which is sure to be a very dramatic ending to a wonderful series. In honor of this great movie series I have decided to collect a series of recipes with inspiration drawn from a few of the movies. The first stop is of course where it all started, The Sorcerer's Stone, and the owl's that helped to bring young Harry Potter back into the world of magic.
It's been some time ago that I had received the book hello, cupcake! and upon looking through it I had found directions for decorating cupcakes to look like owl's. The book does a wonderful job of explaining how to decorate these little pieces of art. Now there is a bit of a funny story to why I only have a photo of three cupcakes. You see while I was separating the Oreo's to make the eye's I was finding that there was plenty of rejects, well instead of setting them aside to eat later I went ahead and gobbled them down. This turned out to be a big mistake and after making only three cupcakes I had managed to consume a dozen or more cookies and quickly became sick to my stomach. On that note, be sure to have plenty of extra Oreo's on hand as you will be surprised at how many will not separate cleanly.
 Items:
12 standard chocolate cupcakes bake in brown paper liners (I used banana bread muffins for something different)
24 mini chocolate cupcakes baked in brown paper liners
24 chocolate cream-filled sandwich cookies (Oreo's)
48 mini chocolate cream-filled sandwich cookies (Mini Oreo's)
2 Tbsp. vanilla frosting
2 cans (16 ounces each) chocolate frosting
12 banana-shaped hard candies (Runts)
24 yellow chocolate-covered sunflower seeds
24 mini chocolate-covered mints (Junior Mints)
48 brown mini candy-coated chocolates (M&M's Minis)
Directions;
1. Microwave a few regular and mini cream-filled sandwich cookies at a time for several seconds (this will help keep the cream filling on one half when you separate the cookies). Be careful no to microwave the cookies for too long, or the filling will melt. Immediately twist each sandwich cookie apart so that you have a cream-covered side and a plain cookie side. Use a paring knife to remove any excess crumbs from the cream filling. Continue until all the cookies have been separated.
2. Using a serrated knife, make 2 parallel cuts 1/2 inch in from the edge on each regular plain cookie half. The 2 outside pieces with the rounded edges will be used for the ears on the mama owls. Cut the mini plain cookie in half.
3. Spoon the vanilla frosting and 1 1/2 cups of the chocolate frosting into separate zip-lock bags, press out the excess air, seal, and set aside. Spread the remaining chocolate frosting on top of the cupcakes and smooth.
4 Using a little chocolate frosting, attach 2 of the larch ear pieces, rounded sides in and about 1 1/2 inches apart, on top of each of the 12 standard cupcakes. Angle the ears slightly away from each other and allow them to extend about 3/4 inch beyond the edge of the cupcake. Repeat the process with the mini cookies and the mini cupcakes, placing the ears about 1/2 inch apart and allowing a 1/2-inch overhang.
5. Place 2 regular cream-sided cookie halves, cream side up, on the upper half of each standard cupcake to make the eyes. Do the same with the mini cream sided cookie halves and the mini cupcakes.
6. Snip a 1/8 inch corner from the bags with the chocolate and vanilla frosting. Pipe lines of chocolate frosting along the length of the cookie ears to cover. Starting with the edge at the top of the cupcake, pipe the feathers with the chocolate frosting using the squeeze-and-pull fur technique(Page 15 of the book). Work inward from the edge in slightly overlapping rows until the section above the eyes is covered. On the standard cupcakes, pipe a few feathers on the edge just below each eye. On the mini cupcakes, pipe several small feathers along the edge beside each eye.
7. Press a yellow candy in the middle of each cupcake to make the beak: the banana-shaped candies on the standard cupcakes, the sunflower seeds on the mini cupcakes.(I used some yellow writing frosting and used it to fill in a nose shape) Use a dot of vanilla frosting on the cream of each cookie to attach a chocolate-covered mint to the eyes on the standard cupcakes and a brown chocolate candy to the eyes on the mini cupcakes,. Place the eyes in different positions to give the owls character. Using the vanilla frosting, pip a whit highlight on each eye.
It's been some time ago that I had received the book hello, cupcake! and upon looking through it I had found directions for decorating cupcakes to look like owl's. The book does a wonderful job of explaining how to decorate these little pieces of art. Now there is a bit of a funny story to why I only have a photo of three cupcakes. You see while I was separating the Oreo's to make the eye's I was finding that there was plenty of rejects, well instead of setting them aside to eat later I went ahead and gobbled them down. This turned out to be a big mistake and after making only three cupcakes I had managed to consume a dozen or more cookies and quickly became sick to my stomach. On that note, be sure to have plenty of extra Oreo's on hand as you will be surprised at how many will not separate cleanly.

12 standard chocolate cupcakes bake in brown paper liners (I used banana bread muffins for something different)
24 mini chocolate cupcakes baked in brown paper liners
24 chocolate cream-filled sandwich cookies (Oreo's)
48 mini chocolate cream-filled sandwich cookies (Mini Oreo's)
2 Tbsp. vanilla frosting
2 cans (16 ounces each) chocolate frosting
12 banana-shaped hard candies (Runts)
24 yellow chocolate-covered sunflower seeds
24 mini chocolate-covered mints (Junior Mints)
48 brown mini candy-coated chocolates (M&M's Minis)
Directions;
1. Microwave a few regular and mini cream-filled sandwich cookies at a time for several seconds (this will help keep the cream filling on one half when you separate the cookies). Be careful no to microwave the cookies for too long, or the filling will melt. Immediately twist each sandwich cookie apart so that you have a cream-covered side and a plain cookie side. Use a paring knife to remove any excess crumbs from the cream filling. Continue until all the cookies have been separated.
2. Using a serrated knife, make 2 parallel cuts 1/2 inch in from the edge on each regular plain cookie half. The 2 outside pieces with the rounded edges will be used for the ears on the mama owls. Cut the mini plain cookie in half.
3. Spoon the vanilla frosting and 1 1/2 cups of the chocolate frosting into separate zip-lock bags, press out the excess air, seal, and set aside. Spread the remaining chocolate frosting on top of the cupcakes and smooth.
4 Using a little chocolate frosting, attach 2 of the larch ear pieces, rounded sides in and about 1 1/2 inches apart, on top of each of the 12 standard cupcakes. Angle the ears slightly away from each other and allow them to extend about 3/4 inch beyond the edge of the cupcake. Repeat the process with the mini cookies and the mini cupcakes, placing the ears about 1/2 inch apart and allowing a 1/2-inch overhang.
5. Place 2 regular cream-sided cookie halves, cream side up, on the upper half of each standard cupcake to make the eyes. Do the same with the mini cream sided cookie halves and the mini cupcakes.
6. Snip a 1/8 inch corner from the bags with the chocolate and vanilla frosting. Pipe lines of chocolate frosting along the length of the cookie ears to cover. Starting with the edge at the top of the cupcake, pipe the feathers with the chocolate frosting using the squeeze-and-pull fur technique(Page 15 of the book). Work inward from the edge in slightly overlapping rows until the section above the eyes is covered. On the standard cupcakes, pipe a few feathers on the edge just below each eye. On the mini cupcakes, pipe several small feathers along the edge beside each eye.
7. Press a yellow candy in the middle of each cupcake to make the beak: the banana-shaped candies on the standard cupcakes, the sunflower seeds on the mini cupcakes.(I used some yellow writing frosting and used it to fill in a nose shape) Use a dot of vanilla frosting on the cream of each cookie to attach a chocolate-covered mint to the eyes on the standard cupcakes and a brown chocolate candy to the eyes on the mini cupcakes,. Place the eyes in different positions to give the owls character. Using the vanilla frosting, pip a whit highlight on each eye.
Thursday, November 11, 2010
Philadelphia Caramel-Pecan Cheesecake
My wife and I LOVE cheesecake, so when my wife came across this recipe in our Kraft Magazine she quickly thrust the magazine at me and said "Make this please!" This was my first attempt ever at a cheese cake and guess what, I didn't get a picture of it. How sad is that! I will say it was very tasty and definitely worth fixing, but I'm sure there has got to be some simpler recipes out there.
Ingredients
50 Nilla Wafers, crushed (about 1 1/2 cups) (I put them in the blender and pulsed it till coarse)
1 cup chopped Planters Pecans, divided
1/4 cup (1/2 stick) butter, melted
4 pkg. (8 oz. each) Philadelphia Cream Cheese, softened
1 cup sugar
1 cup Breakstone's or Knudsen Sour Cream. (I used the Target brand)
3 Tbsp. Flour
1 Tbsp. vanilla
4 eggs
1/4 cup caramel ice cream topping
Directions
Heat oven to 325°
Mix wafer crumb, 1/2 cup nuts and butter; press onto bottom of 13x9-inch pan. Refrigerate until ready to use.
Beat cream cheese ans sugar in large bowl with mixer until blended. Add sour cream, flour and vanilla; mix well. Add eggs, 1 at a time, mixing on low speed after each just until blended. Pour over crust.
Bake 45 min. or until center is almost set. Cool. Erfrigerate 4 hours. Drizzle with topping; top with remaining nuts. Let stand until topping is firm.
Wednesday, November 10, 2010
Pizza Pasta Salad
The past week and a half has been super busy at home and work, which has limited me from working on posting some really tasty recipes. I also have been putting some thought into doing a special post for an upcoming movie release, so be on the look out for that as well. But in the mean time here is a wonderful recipe form Kraft that can pull double duty as either a hot main dish or a cold side dish depending on your needs. I substituted smoked turkey sausage for the hard Salami and it came out wonderful. This dish is full of flavor and does actually have a pizza flair.
Ingredients:
3 cups penne pasta, cooked, drained and cooled
4 tomato's (1 1/2 lb.), chopped
12 slices Oscar Mayer Hard Salami, chopped
1 cup Kraft Natural Italian Cheese Crumbles
1/2 cup sliced fresh basil
1/2 cup Kraft Grated Parmesan Cheese
1/2 cup Kraft Roasted red Pepper
Italian with Parmesan Dressing
Directions
combine ingredients
Refrigerate 1 hour.
Serving Suggestion: This dish is also great served hot. Just toss the hot cooked pasta with the remaining ingredients. Serve Immediately.
 Se
Se
Ingredients:
3 cups penne pasta, cooked, drained and cooled
4 tomato's (1 1/2 lb.), chopped
12 slices Oscar Mayer Hard Salami, chopped
1 cup Kraft Natural Italian Cheese Crumbles
1/2 cup sliced fresh basil
1/2 cup Kraft Grated Parmesan Cheese
1/2 cup Kraft Roasted red Pepper
Italian with Parmesan Dressing
Directions
combine ingredients
Refrigerate 1 hour.
Serving Suggestion: This dish is also great served hot. Just toss the hot cooked pasta with the remaining ingredients. Serve Immediately.

Friday, October 29, 2010
Mexican Grilled Beef (Carne Asada)
A while back we celebrated my Father-in-law's Birthday party and I was given the request for Mexican Food. Now it was time for something different then the traditional taco bar that my wife would prefer, so I began to scour grilling cook books for a good recipe. This one I found in Steven Raichlen's Planet Barbecue! I was so happy to finally get the chance at making another of his recipe's that he has graciously scoured the globe to collect.
In the process of making this meal I learned the draw back of grilling with propane, the fire blows out with a strong enough wind and it's difficult to tell just how much cook time you have left in a bottle. I have also learned to keep a bag of charcoal on hand just in case the propane decides to run dry before your done grilling. But none the less I was able to finish cooking and we had a great time too.

For Grilling
2 poblano peppers, or 4 banana peppers, or other large, moderately hot chile's
1 bunch scallions, trimmed
1 sweet onion, cut crosswise into 1/4-inch thick slices
1 1/2 pounds beef flap meat, skirt steak, hanger steak, or another thin cut of beef (I used flank steak)
Coarse Salt
Freshly ground black pepper
20-24 corn tortillas, preferably freshly made at a Mexican tortilla shop or market, or 12 small flour tortillas
Meat drippings or vegetable oil
For Serving
One or more of these accompaniments:
1 small head green cabbage (about 1 pound), cored and sliced paper-thin
1 large or 2 small cucumbers, thinly sliced
1 bunch radishes, stemmed and thinly sliced
2 ripe avocados, pitted, peeled, cut into wedges or diced, and sprinkled with fresh lime juice to keep it from discoloring
1 cup sour cream
1 cup coarsely grated queso blanco or cotija or jack cheese
3 limes, quartered
1. Set up the grill for direct grilling and preheat it to high. Ideally, you'll grill over wood fire, but you can achieve a similar effect by using dry wood chips on a charcoal or gas grill.
2. When ready to cook, brush and oil the grate. If you are using a charcoal grill, toss the wood chips or chunks on the coals, if using. If you are using a gas grill, add 2 cups of wood chips, if using, or chunks to the smoker box or place them in a smoker pouch under the grate. If you are using poblano peppers or banana peppers, arrange them on the hot grate and grill them until the skins are darkly browned, 3 to 4 minutes per side, 12 to 16 minutes in all (banana peppers will take a little less time than poblanos). Arrange the scallions and onion on the grate and grill them until golden brown on both sides, 2 to 3 minutes per side. Place the scallions or onion on the grate for about 6 minutes after the peppers have grilled.
3. Transfer the grilled vegetables to a chopping block or cutting board. Leave the fire burning. Cut the poblanos into strips, discarding the seeds. Cut the scallions and onion into 2-inch pieces. Arrange the grilled vegetables on a serving platter.
4. Generously season the beef on both sides with salt and garlic powder and pepper, if using. Add the remaining wood chips, if using. Arrange the meat on the hot grate and grill until cooked to taste, 3 to 4 minutes per side for medium. (Mexicans prefer their carne asada medium to medium-well done.) Transfer the grilled beef to a chopping block or cutting board, reserving any of the meat drippings, if desired. Leave the fire burning. (Meat drippings will come from the plate or tray that you place the cooked meat on after cooking.)
5. Lightly brush the tortillas with meat drippings or oil, if desired (this is not necessary but does make the tortillas a little richer and moister). Arrange the tortillas on the hot grate and grill them just long enough to warm them, about 15 seconds per side.
6. Chop or thinly slice the beef across the gran. To eat the carne asada, place a few slices of beef on a warm tortilla, then pile on the grilled vegetables, raw vegetables, sour cream, cheese and salsa(s) of your choice and add a squeeze of lime, if desired.

 I found that slicing them across the grain and on the diagonal made it possible to make thin slices that are easier to chew. Also I prepared chicken and seasoned it the same as the steak, since not everyone in my family is big on steak.
In the process of making this meal I learned the draw back of grilling with propane, the fire blows out with a strong enough wind and it's difficult to tell just how much cook time you have left in a bottle. I have also learned to keep a bag of charcoal on hand just in case the propane decides to run dry before your done grilling. But none the less I was able to finish cooking and we had a great time too.

For Grilling
2 poblano peppers, or 4 banana peppers, or other large, moderately hot chile's
1 bunch scallions, trimmed
1 sweet onion, cut crosswise into 1/4-inch thick slices
1 1/2 pounds beef flap meat, skirt steak, hanger steak, or another thin cut of beef (I used flank steak)
Coarse Salt
Freshly ground black pepper
20-24 corn tortillas, preferably freshly made at a Mexican tortilla shop or market, or 12 small flour tortillas
Meat drippings or vegetable oil
For Serving
One or more of these accompaniments:
1 small head green cabbage (about 1 pound), cored and sliced paper-thin
1 large or 2 small cucumbers, thinly sliced
1 bunch radishes, stemmed and thinly sliced
2 ripe avocados, pitted, peeled, cut into wedges or diced, and sprinkled with fresh lime juice to keep it from discoloring
1 cup sour cream
1 cup coarsely grated queso blanco or cotija or jack cheese
3 limes, quartered
1. Set up the grill for direct grilling and preheat it to high. Ideally, you'll grill over wood fire, but you can achieve a similar effect by using dry wood chips on a charcoal or gas grill.
2. When ready to cook, brush and oil the grate. If you are using a charcoal grill, toss the wood chips or chunks on the coals, if using. If you are using a gas grill, add 2 cups of wood chips, if using, or chunks to the smoker box or place them in a smoker pouch under the grate. If you are using poblano peppers or banana peppers, arrange them on the hot grate and grill them until the skins are darkly browned, 3 to 4 minutes per side, 12 to 16 minutes in all (banana peppers will take a little less time than poblanos). Arrange the scallions and onion on the grate and grill them until golden brown on both sides, 2 to 3 minutes per side. Place the scallions or onion on the grate for about 6 minutes after the peppers have grilled.
3. Transfer the grilled vegetables to a chopping block or cutting board. Leave the fire burning. Cut the poblanos into strips, discarding the seeds. Cut the scallions and onion into 2-inch pieces. Arrange the grilled vegetables on a serving platter.
4. Generously season the beef on both sides with salt and garlic powder and pepper, if using. Add the remaining wood chips, if using. Arrange the meat on the hot grate and grill until cooked to taste, 3 to 4 minutes per side for medium. (Mexicans prefer their carne asada medium to medium-well done.) Transfer the grilled beef to a chopping block or cutting board, reserving any of the meat drippings, if desired. Leave the fire burning. (Meat drippings will come from the plate or tray that you place the cooked meat on after cooking.)
5. Lightly brush the tortillas with meat drippings or oil, if desired (this is not necessary but does make the tortillas a little richer and moister). Arrange the tortillas on the hot grate and grill them just long enough to warm them, about 15 seconds per side.
6. Chop or thinly slice the beef across the gran. To eat the carne asada, place a few slices of beef on a warm tortilla, then pile on the grilled vegetables, raw vegetables, sour cream, cheese and salsa(s) of your choice and add a squeeze of lime, if desired.


Tuesday, October 26, 2010
Sun-dried Tomato chicken
I recently started getting Kraft's magazine Food & Family, thank you to my Wife for that gift. I do have a little complaining to do, this magazine is so full of delicious recipes that I'm easily over whelmed when it comes time to make the grocer list, not a bad problem though.
 When I made this recipe we served it with mac-n-cheese, but it would of been so much better served on a bed of spaghetti noodles. Also, I left out the bacon, per request, something I really didn't like doing as I LOVE bacon.
Ingredients
2 slices Oscar Mayer Bacon, chopped
4 small boneless skinless chicken breast halves(1 lb.)
1 cup Kraft Sun-Dried Tomato Dressing
1 tsp. dried basil leaves
2 tomatoes, chopped
2 tbsp. Kraft Grated Parmesan Cheese
Directions
Cook bacon in large skillet until crisp. Remove bacon from skillet; drain on paper towels. Discard drippings from skillet.
Add chicken to skillet; cook on medium-high heat 2 min. on each side or until browned on both sides. Pour dressing over chicken; sprinkle with basil. Cook on low heat 8 to 10 minutes. or until chicken is done (165 F), turning after 5 min.
Transfer chicken to serving platter, reserving dressing mixture in skillet; cover chicken to keep warm. Add tomatoes to skillet; stir. Cook on medium-high heat 3 min. or until heated through, stirring occasionally. Stir in bacon; spoon over chicken. Top with cheese.
Thursday, October 21, 2010
Black bean and Corn Salad
I'm a big fan of Guy Fieri! I think it's super cool that he's all about cooking and will fix just about anything. He really shows that what we choose to cook, eat and drink has no bearing on a person's masculinity (in this instance) or their identity; something I think happens a little to often in our society. Anyway back to the recipe, I found this recipe watching his show the other day and I just had to try it. As with Guy's style, it's full of flavor and is definitely a great summer side.
 I must confess, the corn bread is Jiffy. I know it's from a box, but it's what I grew up with and it holds a special place in my heart.
Ingredients
4 ears corn, husks removed
2 tablespoons olive oil
1 cup diced red bell pepper
3/4 cup diced red onion
1/4 up cider vinegar
1 (15 ounce can black beans, rinsed and drained
1 teaspoon minced garlic
1/2 cup snow peas, julienned (I omitted these by request)
1 teaspoon sea salt
1 teaspoon freshly cracked black pepper
Directions
Preheat the grill to medium.
Grill the corn until lightly charred, about 2 minutes, turning frequently. Transfer the corn to a cutting board and using a serrated knife remove the kernels. Set aside ( Due to the time of the season, I was unable to find corn on the cob and substituted with frozen corn kernels. I cooked them in a cast iron skillet on high heat until they were lightly browned and then set them aside.)
In a medium pan saute over medium-high heat, add the olive oil, then the red bell pepper and the red onion. Saute for 2 minutes, then add the vinegar, beans and corn and saute for 2 minutes. Stir in the garlic and the snow peas and saute for 1 minute more. Remove from the heat to a serving bowl and season with salt and pepper. Serve warm or cold.
Tuesday, October 19, 2010
7-Layer Meatless Tortilla Pie
Here's a delicious meat free dish with a wonderful Tex-Mex flavor! Now, for me to say any dish that doesn't include meat, in some form, is really saying something. This dish was filling enough that you could serve it on it's own, but would be great served with a small salad or some Spanish rice. I do want to warn you that this is not a quick fix meal as it needs to bake for 40 minutes and will take at least 20 minutes of prep time, so just keep that in mind.

Ingredients
2 cans (about 15 oz each) pinto beans, rinsed and drained
1 cup pace Picante Sauce
1/4 teaspoon garlic powder or 1 clove garlic, minced
2 tablespoons chopped fresh cilantro leaves
1 can (about 15 ounces) black beans, rinsed and drained
1 small tomato
7 flour tortillas (8 inch)
8 ounces shredded cheddar cheese (about 2 cups)
Directions
Mash the pinto beans in a medium bowl with a fork. Stir in 3/4 cup picante sauce and the garlic powder. (You could easily substitute pinto beans with re-fried beans for more flavor)
Stir the remaining picante sauce, cilantro, black beans and tomato in a medium bowl.
Place 1 tortilla onto a baking sheet. Spread 3/4 cup pinto bean mixture over the tortilla to within 1/2-inch of the edge. Top with 1/4 cup cheese. Top with 1 tortilla and 2.3 cup black bean mixture. Top with 1/4 cup cheese. Repeat the layers twice more. Top with the remaining tortilla and spread with the remaining pinto bean mixture. Cover with aluminum foil.
Bake at 400 degrees F for 40 minutes or until the filling is hot. Uncover the pie. Top with the remaining cheese. Cut the pie into 6 wedges. Serve with additional picante sauce and sprinkle with additional cilantro, if desired.
Wednesday, October 13, 2010
Sweet-and-Spicy Chicken Stir-Fry
In my house oriental food of any kind is only really popular with me, my wife isn't so big on it. The only time I can get her to eat oriental is at the Japanese Steakhouse down the road from our house. But with having a little one going out to eat is a challenge. So when I found this recipe at Kraft Foods for Sweet-and-Spicy Chicken Stir-Fry, I jumped at it. It's got a touch of traditional stir-fry flavor but doesn't go over board, which is a huge plus with my wife and apparently with my 17 month old who ate a fair amount of it.

1lb. Boneless skinless chicken breasts, cut into 1-inch pieces
1 tbsp. Oil
3 cups cut-up fresh vegetables (red and green bell peppers, baby carrots, mushrooms, snow peas)
1 clove garlic, minces
1/4 cup Kraft Catalina dressing
2 tbsp. Hoisin sauce
1/4 tsp. Crushed red pepper
2 cups hot cooked long-grain white rice
Cook and stir chicken in hot oil in large skillet on high heat 3 min.
Add vegetables and garlic; cook ans stir 5 to 6 min. or until chicken is lightly browned.
Stir in all remaining ingredients except rice; cook 2 min. or until chicken is done and vegetables are crisp-tender, stirring occasionally. Serve over rice
Monday, October 11, 2010
Healthy Game Day Chili Dogs
This is a recipe I like to call my own; and it stay's on the healthy side with ground turkey, fat free beans, turkey dogs, and wheat hot dog buns. Now when I make chili I usually just walk through the grocery store aisles and grab what ever sounds good in my chili, that's how my Grandma taught me to make it anyway. It has plenty of meat and beans so it'll be sure to feel you up and would go great with some cold beer.

Chili
1 can of pinto beans
1 can of dark red kidney beans
1 can of diced tomato
1 can of tomato sauce or paste if you like your chili on the thick side
1 pound of ground turkey
1 medium yellow onion
3 tbsp of chili powder or more to flavor
1 tsp of cumin
1 tsp of paprika
1. Brown the ground turkey in a skillet and pour off any grease.
2. Dump the pinto beans, dark red kidney beans, diced tomato, tomato sauce, cooked ground turkey, and seasonings into the crock pot and set on high.
3. Dice the onion and throw it in the pot.
4. Cook on high for 4-6 hours, stirring occasionally and add water as needed.
5. Cook the hot dogs any way you like. I boiled mine in some water for about 5 minutes or you could easily grill them on the gas grill.
Monday, October 4, 2010
Slow Cooker chicken and Dumplings
It's now October and Fall is officially upon us. With the cooler days and nights all ready here, I figured it was time for a slow cooker classic and a meal that will really fill you up. Now I can't think of a more traditional meal then chicken and dumplings, and in my book it easily qualifies as comfort food.

Ingredients
4 skinless, boneless chicken breast halves
2 table spoons butter
2 (10.75 ounce) cans condensed cream of chicken soup
1 onion
2 (10 ounce) packages refrigerated biscuit dough, torn into pieces
Directions
1. Place the chicken, butter, soup, and onion in a slow cooker, and fill with enough water to cover.
2. Cover, and cook for 5 to 6 hours on High. About 30 minutes before serving, place the torn biscuit dough in the slow cooker. Cook until the dough is no longer raw in the center.
The wonderful thing about slow cookers is their ease of use, sadly I just do not use mine as much as I would like. So my goal for this fall and winter is to use it as much as possible.
Thursday, September 30, 2010
Fall Frappe's
I apologize for the lack of posts recently, we went on our first family vacation to St. Louis. While on vacation I decided to take it quite literal and do nothing that was not family oriented. But now that vacation is over and it's time to get back to work. I thought it appropriate for some caffeine and to do a personal favorite from Starbucks, the Pumpkin Pie Frappe! It's a shame this drink is seasonal because it's one of my favorites. I also did another seasonal Frappe for my wife, she was a bit hesitant about the Pumpkin Pie Frappe until she tried one while on vacation, so for her I did the Gingerbread Latte Frappe. Now I found both these recipes on the online site for the Mr. Coffee Frappe maker, they've got quite a few other recipes that are not in the cook book that accompanies the maker.
Pumpkin Pie Frappe
Coffee & Water in brewer:
3 tbsp ground dark roast coffee or espresso
1/2 cup water
Place ingredients in blender jar in this order:
2 cups ice cubes
1/4 cup packed brown sugar
3 tbsp canned pumpkin puree
1/2 tsp vanilla extract
1/4 tsp pumpkin pie spice
1/3 cup evaporated milk or half and half
tip: Three tablespoons canned pumpkin pie filling can also be used in place of 3 tablespoons canned pumpkin puree
Gingerbread Latte Frappe
Coffee & water in brewer:
3 tbsp ground dark roast coffee or espresso
1/2 cup water
Place ingredients in blender jar in this order:
2 cups ice cubes
3 tbsp packed brown sugar
1/2 tsp vanilla extract
1/8 tsp ground ginger
1 to 2 pinches ground cinnamon
1 to 2 pinches ground cloves
1/4 cup half and half or whole milk

Thursday, September 23, 2010
Choclate Chip Cookies
I chose to do this recipe out of pure indulgence for something sweet and naughty, so much for sticking with the diet this week. It all started when I was at the grocery store picking up a few items that some how managed to get left of the grocery list that week. I made the mistake of walking down the baking aisle and when I passed the bags of chocolate chips they mysteriously jumped into my cart. I swear! Now this is the point where all rationality was lost and my sweet tooth, which I'm know for having a sever case of, won out.

This recipe comes from the Kitchen Aide Stand Mixer recipe book, and I need to find a recipe that makes far fewer cookies. The cook book list the servings at 54, while I didn't count them I would suspect I made in the neighborhood of 48-50. So as not to look like a complete pig, I packaged some up and sent them home with my in-laws.
1 cup granulated sugar
1 cup brown sugar
1 cup (2 sticks) butter or margarine, softened
2 eggs
1 1/2 tsp vanilla
1 tsp baking soda
1 tsp salt
3 cups flour
12 ounces semi-sweet chocolate chips
Place sugars, butter, eggs, and vanilla in mixer bowl. Attach bowl and flat beater to mixer. Turn to speed 2 and mix about 30 seconds. Stop and scrape bowl. Turn to Speed 4 and beat about 30 seconds. Stop and scrape bowl.
Turn to Stir Speed. Gradually add baking soda, salt, and flour to sugar mixture and mix about 2 minutes. Turn to Speed 2 and mix about 30 seconds. Stop and scrape bowl. Add chocolate chips. Turn to Stir Speed and mix about 15 seconds.
Drop rounded teaspoonfuls onto greased baking sheets, about 2 inches apart. Bake at 375 degrees F four 10 to 12 minutes. Remove from baking sheets immediately and cool on wire racks.
Now I'm sure not everyone really wants to know how the nutrition value of these chocolate chip cookies, but since it's listed in the cookbook, here you go.
1 Cookie Per Servings:about 117 calories, 1 G protein, 17 G carb, 5G fat, 8 mg Chol, 106 mg Sodium
Saturday, September 18, 2010
Blueberry Lemon Muffins
Here's another recipe from Deceptively Delicious! I made these for a food day my wife was having at work last week. The muffins came out great; they were light, fluffy, and tasted like a blueberry muffin with out vegetable purees hidden in them. My little girl loved them, which is no surprise, because she loves blueberries and anything with whole blueberries mixed in.
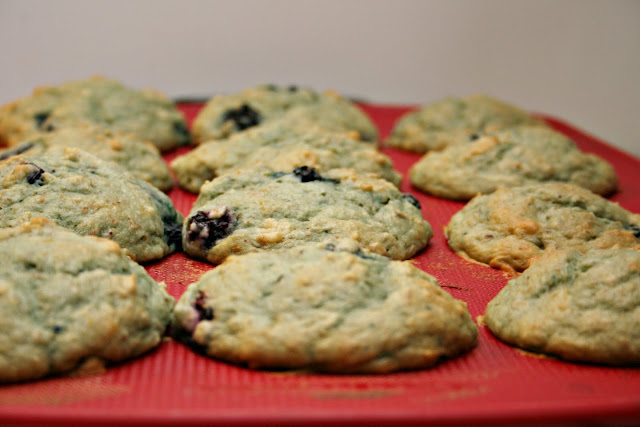
Nonstick cooking spray
1/2 cup firmly packed light or dark brown sugar4tbsp trans-fat-free soft tub margarine spread, chilled1 cup low fat lemon yogurt
1 cup blueberries
1/2 cup yellow squash puree(I substituted cauliflower puree with great results)
1 large egg
2 tsp pure lemon extract
2 cups all-purpose flour
1/4 cup flax sed meal
1 tsp baking powder
1 tsp baking soda
1/2 tsp salt
1.Preheat the oven to 350 degrees F. Coat a 12 cup muffin tin with cooking spray or line with paper baking cups.
2. In a large bowl, beat the sugar and the margarine with a wooden spoon. Stir in the yogurt, blueberries, yellow squash puree, egg, lemon extract, and lemon zest.
3. Add the flour, flaxseed meal, baking powder, baking soda, and salt. Stir just to combine, but do not overmix, the batter is supposed to be lumpy.
4. Divide the batter among the muffin cups. Bake until the tops of the muffins are lightly browned and a toothpick comes out clean when inserted i nthe center, 13 to 16 minutes. Turn the muffins out onto a roack to cool.
5. Store in an airtight container at room temperature for up to 2 days, or wrap individually and freeze for up to 1 month.
Homemade Apple Pie
This past weekend was the first weekend the local apple orchards were open for self picking of the apples. We had tried to attend last year, but unfortunately were just not able to make it in time, so this year we were on the ball to make sure we made time to go. We all had a blast picking apples, playing with a little play house they had there, and we almost came home with a kitten; thankfully they weren't old enough to be adopted. When we got home I knew just what needed to be done with the fresh picked apples, apple pie. I've made apple pie before and used a store bought pie crust, but I decided making pie crust is a skill I need to learn. I scoured my cook books and the internet and finally found a recipe that would work for the ingredients I had on hand. I don't use, therefore I don't keep, shortening in my kitchen. I do however try to keep plenty of butter, or imitation butter anyway, on hand.
 For my first attempt at making a pie crust I think I did a pretty good job. It was a little tough and dry especially around edge, so I may have used a little to much flour and will have to try to use less next time.
 The pie filling came out wonderful! The spices were great, the apples were cooked through, and it was so juicy. The only thing that was missing was a scoop of vanilla ice cream to with it. That day was a perfect fall day, the temperature was on the cool side and the house was filled with the smell of baked apples and cinnamon.
 Butter Pie Crust
1 1/4 cups all-purpose flout
1/4 tsp salt
1/2 cup butter, chilled and diced
1/4 cup ice water
1. In a large bowl, combine flour and salt. Cut in butter until mixture resembles coarse crumbs. Stir in water, a tablespoon at a time, until mixture forms a ball. Wrap in plastic and refrigerate for 4 hours or overnight.
2. Roll dough out to fit a 9 inch pie plate. Place crust in pie plate. Press the dough evenly into the bottom and sides of the pie plate.
Apple Pie Filling
5-6 cups sliced apples
1/8 tsp salt
1/2-2/3 cup sugar
1/4 tsp cinnamon
1-1 1/2 tbsp cornstarch
1/8 tsp nutmeg
Preheat oven to 450 degrees.
Line a 9 inch pie pan with crust. Peel and slice apples into thin pieces. Combine sugar, salt, cornstarch, cinnamon and nutmeg. Stir apple slices in until they are well coated. Place the apples in layers in the pie shell. Cover with upper crust. Be sure to prick holes in it for venting. Bake at 450 degrees for 10 minutes. Reduce heat to 350 degrees and bake for 35-50 minutes more until done.
Monday, September 13, 2010
15-Minute Chicken & Rice Dinner
I love any meal that has utilizes a minimal number of utensils and this recipe from Campbell's Kitchen does just that. I kept a rough cook time of approximately 20 minutes, which comes more from the fact that I'm still learning how to cook in a skillet with out setting off the smoke detectors.
1tbsp vegetable oil
4 skinless, boneless chicken breast halves (about 1 pound)
1 can (10-3/4 oz.) Campbell's Condensed Cream of Chicken Soup
1-1/2 cups water
1/4 tsp paprika
1/4 tsp ground black pepper
2 cups uncooked instant white rice
2 cups fresh or frozen broccoli florets
Heat the oil in a 10-inch skillet over medium-high heat. Add the chicken and cook for 10 minutes or until well browned on both sides. Remove the chicken from the skillet.
Stir the soup, water, paprika and black pepper in the skillet and heat to a boil. Stir in the rice and broccoli. Reduce the heat to low. Return the chicken to the skillet. Sprinkle the chicken with additional paprika and black pepper. Cover and cook for 5 minutes or until the chicken is cooked through.

Friday, September 10, 2010
Roll Ups!
This dish has become a staple at all family get together, it's always the first thing my wife is asked to bring. So when I told her I wanted to do some quick and easy snacks for a football game, she quickly volunteered herself to make these.
Flour burrito tortilla shells
1 tub of Whipped Cream Cheese
Garlic salt
Dried Beef
Lay a tortilla shell out and smear with cream cheese covering the entire shell. Then season the cream cheese to taste with garlic salt. Next lay a line of dried beef across the center of the shell, from one side to the other. Finally, take an edge opposite of the dried beef and roll the tortilla shell up. Slice the tortilla into approximately one inch slices.
 As you can see, we barely got a photo of these that's how popular these are. In fact one package of tortilla shells and a small tub of cream cheese will feed only 4 people, so be prepared to double or even triple this recipe.
Flour burrito tortilla shells
1 tub of Whipped Cream Cheese
Garlic salt
Dried Beef
Lay a tortilla shell out and smear with cream cheese covering the entire shell. Then season the cream cheese to taste with garlic salt. Next lay a line of dried beef across the center of the shell, from one side to the other. Finally, take an edge opposite of the dried beef and roll the tortilla shell up. Slice the tortilla into approximately one inch slices.

Thursday, September 9, 2010
Football Snacks!!
Football season has officially begun tonight with the Saints vs. Vikings and I thought it would be appropriate to give mention to a couple of oldie's but goodies. Yup you guessed it, Rotel and Smokey Sausages in BBQ sauce. Both these dishes seem to be a staple at any football party and for some unknown reason, no party would be complete with out them. I guess one could say their as American as apple pie. So here's to football season, may the best team win!
 All you need is a can of Rotel, Velveeta, and a bag of your favorite chips. Dice the Velveeta into chunks, pour the Rotel over the cheese, and microwave till soft.
 The wonderful thing about this dish, is it gives you an excuse to eat a large amount of your favorite BBQ sauce, just what I need! I used KC Masterpiece Honey BBQ sauce and one package of Smokey Sausages, it made served 4 people.


Sunday, September 5, 2010
French Toast
Breakfast is the most important meal of the day and nothings better then a meal that will fill you up and stick with you, and french toast has always done that for me. I got this recipe from Deceptively Delicious, as I have only made french toast on a very few occasions with results I was less then happy with. We decided to have breakfast for dinner to mix it up a little, needless to say it was enjoyed by all.
4 large eggs
2tbsp banana or pineapple or sweet potato or carrot or butternut squash puree or canned pumpkin (Make sure its on the watery side so it mixes well with the eggs)
1/4 tsp cinnamon
4 slices whole-wheat bread
Nonstick cooking spray
2 tsp trans-fat-free soft tub margarine spread
Pure maple syrup, confectioner's sugar, or fresh fruit, for serving
Flaxseed meal (optional)
1. In a shallow bowl, whisk the eggs, puree, and cinnamon. Add the bread slices and turn them in the mixture to soak for 30 seconds to 1 minute (any longer and the bread will get soggy).
2. Coat a nonstick griddle or large nonstick skillet with cooking spray and set it over medium-high heat. When the pan is hot, add the margarine. When the margarine sizzles, add the soaked bread slices (sprinkle with flaxseed if you like) and cook until golden brown on the outside, 2 to 3 minutes per side. Serve warm with syrup, confectioners' sugar, or fruit.

Tuesday, August 31, 2010
Fajita's
This has to be one of my favorite dishes to do on the grill. Their quick, easy, and really simple making it a great dish when time is short. I start with boneless skinless chicken breast, you can replace or pair it with steak if you like, and season it with some Fajita seasoning that you can buy at any grocery store. I use the seasoning like a rub and sprinkle it all over the meat. Next I cut up bell peppers by removing the core with the seeds and slicing it into four large strips. I don't know if there is any rule of thumb on the color of bell peppers you use, but I use what ever is on sale at the time making this a very colorful dish. I then slice up in onion, like you would for onion rings but leaving the slices together. Once all the vegetables are sliced your ready for the grill, you will be grilling these direct over a hot fire. I like to put the vegetables on first because they always seem to cook a little slower then the chicken and you can always move the vegetables to the warming rack on your grill or to a warm spot if you have one. With the veggies on the grill you can put the chicken on the grill and cook through. While your those are cooking you can gather up your tortillas and have them ready to warm up on the grill, or if you have enough grill space you can warm them up a few minutes before you think the rest of the stuff is ready to come off the grill. When grilling any type of bread, especially thin breads, you have to keep a close eye on them because they will burn very quickly, remember were just warming these up. With the chicken, peppers, and onion finished cooking it's time to slice them up. I like to slice them into thin manageable strips and serve them with sour cream, salsa, lettuce, tomato, and shredded cheese. So there you have it, a quick and healthy week night dinner.


Wednesday, August 25, 2010
Vanilla Cake with Cherries and Cream
One of the places I get a weekly email of recipes from is Weber, and I finally got around to fixing one of them the other day. The sad part is, I didn't get to this on the grill as it says, mainly because we were experiencing triple digit temperatures that day and i was not about to go stand around a hot grill. Overall the recipe was great, every part was delicious and I can't wait for a cooler day to try it on the grill.
1 tbsp unsalted butter
1-3/4 cups all-purpose flour
2 tsp baking powder
1/4 tsp kosher salt
1 cup granulated sugar
3 large eggs, at room temperature
1/2 cup whole milk
1/3 cup canola oil
2 tsp pure vanilla extract
2 pints ripe cherries, pitted and quartered
4 tbsp granulated sugar, divided
1 tbsp fresh lemon juice
1 cup heavy cream
1. Prepare the grill for indirect cooking over medium heat (about 350F). Grease a 9-inch cake pan (2 inches high) with the butter. In a medium bowl sift together the flour, baking powder, and salt.
2. in the bowl of a stand mixer or using a hand-held mixer, whisk the sugar and eggs until the mixture is pale yellow in color, about 5 minutes. Add the milk, oil,, and vanilla and whisk for 2 minutes more. Add the flour mixture and whisk until just combined, scraping down the sides of the bowl. Pour the cake batter into the cake pan and spread with a spatula to even out the batter.
3. Cook over indirect medium heat, with the lid closed, for 20 minutes. Rotate the pan 90 degrees for even cooking. Continue to bake until a skewer inserted in the center comes out clean and there is no jiggle in the center of the cake, 15 to 20 minutes more. Let cool completely on a wire rack. Run a knife around the edge of the cake, making sure to run the tip along the bottom of the pan. Invert out of the skillet onto a board. Invert the cake again onto a serving platter.
4. In a medium bowl combine the cherries, 2 tbsp of the sugar, and the lemon juice. Allow to sit at room temperature for 5 to 10 minutes. Meanwhile, in a medium bowl add the cream and the remaining 2 tbsp of sugar, whip to stiff peaks. slice the cake and serve with the cherries and whipped cream on top.

Monday, August 23, 2010
Easy Beef Enchiladas
We love Mexican food and are in need of something quick and easy, and this recipe from Campbell's is just that. It's a great recipe that can be put together and ready to eat in about 30 minutes, making it great for school nights.
1 pound ground beef
1 package taco seasoning mix or burrito seasoning mix
1 can re-fried beans(about 16 ounces)
1 can Campells's Condensed Cheddar Cheese Soup(10 3/4 ounces
1 medium onion, chopped (about 1/2 cup)
12 flour tortillas (10 inch), warmed
1 1/2 cups prepared enchilada sauce
Shredded Cheddar cheese
Heat the oven to 350 F. Cook the beef in a 10-inch skillet over medium-high heat until well browned, stirring often to separate meat. Pour off any fat. Stir the seasoning mix, beans, soup, onion and rice, if desired, in the skillet.
Divide the beef mixture among the tortillas. Roll up the tortillas and place seam-side down into a 3-quart shallow baking dish. Pour the enchilada sauce over the filled tortillas and sprinkle with the cheese.
Bake for 20 minutes or until the enchiladas are hot and bubbling.

Friday, August 20, 2010
Lasagna
I love lasagna, so when I saw that there was a recipe in Deceptively Delicious, I had to try it. Now this would be my first attempt at what appears to be a pretty intricate Italian dish, but the recipe is very easy to follow and the results were great.
Nonstick cooking spray
1 tbsp olive oil
1 pound lean ground turkey or sirloin
1 tsp salt
1/4 tsp pepper 1 tbsp all-purpose or whole-wheat flour
3 cloves garlic, chopped
2 tbsp reduced-fat sour cream
1/2 cup sweet potato puree
1/2 cup grated Parmesan
1 (26 ounce) or 2 (15 ounce) cans whole, peeled tomatoes, with their juice
1 small onion, chopped
1 cup low fat cottage cheese
1/2 cup cauliflower puree
1 (8 ounce) box no-boil lasagna noodles
2 cups shredded part-skim mozzarella
1. Preheat the oven to 350 degrees F. Coat an 8x12 inch baking dish with cooking spray.
2. For the meat filling, coat a large nonstick skillet with cooking spray and set it over medium-high heat. When the pan is hot, add the oil. Add the turkey or beef, sprinkle with salt and pepper, and cook, stirring occasionally, until the meat is no longer pink, 4 to 5 minutes. Sprinkle in the flour and half of the garlic, stir, and cook for 1 to 2 minutes longer. Off the heat, stir in the sour cream, sweet potato puree, and half (1/4 cup) of the Parmesan; set aside.
3. For the sauce, combine the tomatoes and juice, the onion, and the remaining garlic and Parmesan (1/4 cup) in a food processor or blender and process until smooth. Transfer the sauce to a bowl or large measuring cup. Or use jarred sauce and just add Parmesan.
4. In the same blender or food processor, blend the cottage cheese, egg white, and cauliflower puree until smooth; set aside.
5. Too assemble the lasagna, spread 1 cup of the tomato sauce over the bottom of the baking dish. layer about one-third of the noodle on top, covering the sauce completely. Spread the meat filling over them. (If you are going meat-less, just add a first layer of cottage cheese.) cover with another one-third of the noodles and then spread all of the cottage cheese mixture ore them. make another layer with the rest of the noodles and spoon the remaining tomato sauce over the top. Sprinkle evenly with mozzarella.
6. Cover the lasagna with aluminum foil and bake until the cheese has melted and the noodles are cooked though, about 40 minutes. Remove the foil and bake for 10 minutes longer, or until the top is bubbly and browned.

Wednesday, August 18, 2010
Best Ever Meatloaf
I love meatloaf, not the rock star, but the food, which my wife is the opposite, go figure. Anyway, since my wife refuses to eat meatloaf I decided to fix it and eat as left overs for lunch. This recipe was very simple to put together and was delicious, I even plan on trying it on the smoker some time.
2 pounds ground beef
1 can (10 3/4 ounces) Campbell's Condensed Tomato Soup (Regular or Healthy Request)
1 envelope (about 1 ounce) dry onion soup and recipe mix
1/2 cup dry bread crumbs
1 egg, beaten
1/4 cup water
Thoroughly mix the beef, 1/2 cup tomato soup, onion soup mix, bread crumbs and egg in a large bowl. Place the mixture into a 13x9x2-inch baking pan and firmly shape into an 8x4-inch loaf.
Bake at 350F. for 1 hour 15 minutes or until the meatloaf is cooked through. Let the meatloaf stand for 10 minutes before slicing.
Heat 2 tbsp of pan drippings, remaining tomato soup and water in a 1-quart sauce pan over medium heat until the mixture is hot and bubbling. Serve the sauce with the meatloaf.

Subscribe to:
Comments (Atom)